
SMT Machine Setup and Calibration: Laying the Foundation

Successful SMT machine operation begins with initial alignment and level calibration of the production line, where even a 0.1° tilt in conveyor rails can reduce placement accuracy by up to 12% (PCB Assembly Journal, 2023). Modern systems use laser-guided leveling tools to achieve ±15μm planar uniformity across the entire workspace.
For feeder installation and component tape configuration, engineers must match feeder pitch to tape sprocket holes while maintaining 45°–60° angles for optimal tape advancement. A 2023 industry study found that improper feeder alignment accounts for 23% of misaligned components in prototype runs.
Nozzle selection and vacuum pressure tuning directly impact pick-and-place success rates. High-viscosity components like BGAs require nozzles with ≥ 80 kPa vacuum pressure, while smaller 0201 chip components operate best at 40–50 kPa. Closed-loop pneumatic sensors now automatically adjust vacuum levels during runtime to compensate for nozzle wear.
First-article board verification relies on fiducial mark detection systems achieving ±5μm registration accuracy. Advanced algorithms cross-reference board CAD data with optical scans to detect mismatches in under 0.8 seconds per panel.
Lastly, real-time machine calibration through closed-loop feedback systems reduces thermal drift errors by 70% compared to static calibration methods. These systems continuously monitor variables like ambient humidity and machine temperature, making 200–300 micro-adjustments per hour to maintain sub-10μm placement precision.
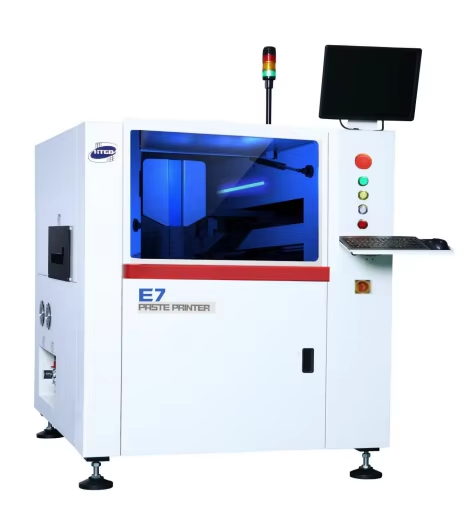
Precision in Solder Paste Printing and Stencil Management
Squeegee Pressure, Speed, and Angle Optimization in Solder Paste Printing Process
Getting the squeegee settings right can cut down on solder paste defects by around 27% during those fast paced SMT operations according to the Electronics Manufacturing Institute. When it comes to dynamic pressure control systems, they help keep the paste rolling smoothly along the entire length of the stencil which matters a lot when working with bigger circuit boards. Looking at industry numbers, we find that about one third of all rework expenses stem from issues like smearing or not enough paste being deposited properly. For best results with tiny 01005 components, most manufacturers stick to a 60 degree squeegee angle while applying pressure somewhere between 1.2 and 1.8 kilograms per square centimeter. This setup usually gets them under 25 microns of positional accuracy, which is pretty impressive considering how small these parts actually are.
Stencil Alignment and Tension Control in SMT Assembly Process Steps
Laser-cut nano-coated stencils reduce aperture wall roughness to <5μm (2024 PCB Materials Report), enabling reliable paste release for 0.3mm-pitch BGAs. Tension-controlled frames maintain 35–50N/cm² stencil stability, preventing misregistration during high-speed printing. Leading manufacturers report 98.6% first-pass yields using step stencils with ±15μm thickness adjustments for mixed-component boards.
Solder Paste Inspection (SPI) for Volume and Coplanarity Analysis
3D SPI systems detect 83% of downstream defects by measuring paste volume (±15% tolerance) and height coplanarity (Cpk ≥1.33). Real-time feedback loops adjust printer parameters when anomalies exceed 5σ thresholds. A 2023 study found SPI integration reduces bridging defects by 41% and tombstoning by 67% in complex assemblies.
Common Defects: Smudging, Insufficient Paste, and Bridging Detection
| Defect Type | Root Cause | Prevention Strategy |
|---|---|---|
| Smudging | High squeegee speed | Optimize to 20–50mm/s |
| Insufficient | Clogged apertures | Nano-coated stencils + SPI |
| Bridging | Excess paste volume | Laser-repaired aperture walls |
| Inline thermal cameras now detect emerging bridge formations during printing, triggering automatic stencil wiping cycles. |
High-Accuracy Component Placement with Pick-and-Place Machines
High-speed vs. flexible placement machines in PCB assembly process flow
High-speed pick-and-place machines excel in processing simple boards at speeds exceeding 50,000 components/hour. Flexible machines handle complex assemblies and varied geometries with precise positioning (±5μm). Production requirements dictate machine selection, balancing throughput against component diversity.
Vision system calibration for component centering and rotation correction
Advanced vision systems measure component displacements using real-time image processing. Offset calculations automatically adjust nozzle positioning before placement. Dual cameras verify pin-1 alignment on ICs and correct rotational misalignment within milliseconds. These features reduce misplacement errors by over 62% in high-density designs according to controlled assembly trials.
Placement accuracy and repeatability under varying environmental conditions
| Environmental Factor | Accuracy Impact | Mitigation Strategy |
|---|---|---|
| Temperature Variance | ±12 μm/°C | Thermal stabilization chambers |
| Humidity Fluctuation | ±8 μm/%RH | Climate-controlled production floors |
| Vibration | Up to 25 μm | Isolated machine foundations |
| Maintaining stable factory conditions keeps placement deviations below 15μm—critical for 0201 components. |
Data-driven optimization of placement head movements
Machine learning algorithms analyze component location patterns to minimize travel paths. Placement sequences are reconfigured to reduce non-productive movements by 17% on average. Adaptive motion planning accounts for component replenishment times. These optimizations typically yield 12–15% faster cycle times without compromising placement integrity.
Reflow Soldering and Thermal Profiling for Reliable Joints

Four-Stage Reflow Soldering Process: Preheat, Soak, Reflow, and Cooling
In modern surface mount technology, managing heat properly during reflow soldering is absolutely essential. The process generally follows four main stages. First comes preheating at around 1.5 to 3 degrees Celsius per second to prevent components from getting damaged by sudden temperature changes. Next there's the soak phase lasting anywhere from 60 seconds to as long as 180 seconds, which helps activate the flux and gets everything up to a similar temperature level. When it gets to the actual reflow stage, those lead-free solder materials need to hit their peak temps between 230 and 250 degrees Celsius. This creates those important intermetallic bonds that really determine how strong the joints will be in the final product. Finally, proper cooling matters too. Cooling down at a controlled rate of 3 to 6 degrees per second keeps micro cracks from forming as the solder cools past 75 degrees Celsius. Most experienced technicians know this careful cooling makes all the difference in ensuring reliable connections without defects.
Thermal Profiling for Lead-Free and SAC305 Solder Alloys
SAC305 alloys require tighter temperature tolerances than traditional tin-lead solder, with liquidus thresholds at 217±2°C. Advanced thermal profiling uses 8–12 thermocouples per 500 mm² to monitor gradients across high-density boards. Recent studies show a 34% reduction in head-in-pillow defects when maintaining time above liquidus (TAL) between 60–90 seconds.
Impact of Conveyor Speed and Zone Temperature on Joint Integrity
| Parameter | Optimal Range | Defect Risk Beyond Range |
|---|---|---|
| Conveyor Speed | 65–85 cm/min | Tombstoning (+18%) |
| Preheat Zone Temp | 150–180°C | Solder balling (+27%) |
| Peak Zone Temp | 240–250°C | Pad lifting (+42%) |
Slower conveyor speeds below 60 cm/min expose components to prolonged heat, increasing warpage risks by 23% in FR-4 substrates. Closed-loop thermal control systems adjust zone temperatures ±1.5°C to compensate for component density variations.
Automated Inspection and End-of-Line Process Control
Automated optical inspection (AOI) and defect detection algorithms
Today's AOI systems use high res cameras along with machine learning algorithms to spot issues like solder bridges, missing parts, and alignment problems down to the micron level. According to the latest Packaging Quality Report from 2024, factories that switched to AI based visual inspections saw a drop in false alarms by around 40 percent when compared against old school manual checking methods. The machines can process as many as ten thousand circuit boards every single hour. They check their results against standard random sampling procedures used across the industry, which helps cut down on both kinds of mistakes that happen during quality control processes.
X-ray inspection for BGA and hidden joint quality assessment
X-ray tomography resolves defects in ball grid arrays (BGAs) and QFN packages with 5μm resolution, detecting voids <15% in solder joints. Unlike optical methods, it penetrates multi-layer PCBs to analyze connections obscured by components or shielding cans. Recent advancements enable real-time 3D reconstructions at 30 fps, critical for high-mix production environments.
Integration of AOI and SPI data into closed-loop feedback systems
By merging solder paste inspection (SPI) metrics with AOI results, manufacturers achieve 92% first-pass yield improvements in controlled trials. This data fusion enables:
- Dynamic stencil pressure adjustments during print cycles
- Automatic feeder recalibration when placement drift exceeds ±0.025mm
- Predictive maintenance alerts for nozzles showing vacuum decay
Final quality audit, traceability logging, and performance metrics (Yield, Uptime, DPM)
Post-assembly audits log over 200 parameters per board, including:
| Metric | Industry Benchmark | Premium Performance |
|---|---|---|
| DPM (Defects/Million) | <500 | <50 |
| Uptime | 85% | 95% |
| OEE (Overall Equipment Effectiveness) | 70% | 89% |
Blockchain-enabled traceability systems now store 18-month production histories on encrypted ledgers, slashing recall investigation times by 60%.
Safe shutdown sequence and maintenance preparation for SMT machine operation
Proper shutdown protocols prevent 73% of nozzle clogging incidents (IPC-9850A standards). Technicians must:
- Purge solder paste from stencil printers within 30 minutes of downtime
- Store feeders at 40–50% humidity to prevent component oxidation
- Lubricate linear guides with NSF H1-certified grease weekly
Multi-stage vacuum decay tests verify machine readiness before restarting production.
This end-stage process control ensures SMT machines maintain ≤10μm placement accuracy across 10,000+ cycle counts while meeting ISO 9001:2015 quality thresholds.
FAQs
Why is initial alignment and level calibration crucial for SMT machines?
Initial alignment and level calibration are essential to ensure precision in placement during the SMT assembly process. Even a minor tilt can drastically affect accuracy.
How does feeder alignment affect component placement?
Improper feeder alignment can lead to misaligned components, affecting the overall quality of the assembly and increasing rework expenses.
What are common defects in solder paste printing?
Common defects include smudging, insufficient paste, and bridging, which can be prevented by optimizing squeegee settings and using advanced inspection systems.
How does AOI improve the quality control process?
Automated optical inspection systems enhance defect detection by using machine learning algorithms, significantly reducing the rate of false alarms compared to manual inspections.
Table of Contents
- SMT Machine Setup and Calibration: Laying the Foundation
- Precision in Solder Paste Printing and Stencil Management
- High-Accuracy Component Placement with Pick-and-Place Machines
- Reflow Soldering and Thermal Profiling for Reliable Joints
-
Automated Inspection and End-of-Line Process Control
- Automated optical inspection (AOI) and defect detection algorithms
- X-ray inspection for BGA and hidden joint quality assessment
- Integration of AOI and SPI data into closed-loop feedback systems
- Final quality audit, traceability logging, and performance metrics (Yield, Uptime, DPM)
- Safe shutdown sequence and maintenance preparation for SMT machine operation
- FAQs